Butternut Squash Linguini with Fried Sage

My garden this year has been a *huge* learning experience. A few to many set backs and lots of frustrations. So with that being said, I’ve noticed my blog has temporarily turned more into a cooking blog, which I don’t necessarily mind, I enjoy cooking! But my main reason for this blog is to document my gardening experiences, good or bad. So this week I will write a post doing just that and briefly talk about my plans for our fall garden. P.S we have about 14 weeks (give or take) until our first frost, if you are planting a garden this fall, start planning!

SO…a vegan PASTA dish. No butter. No cream. No cheese..unless you want it in there, in that case I won’t tell anyone ;).

10393964_10102013481773352_1074372403080665239_n

Continue reading

Pizza Crust

You know how hard it is to find a 4 leaf clover? I feel that way towards pizza dough. It’s near impossible. For the last 5 years I’ve tried, probably close to 20 recipes. They were all fine. I mean in the end they were technically ‘pizza crusts’. But this pizza crust…fantastico!

There are two KEY steps to making a beautiful looking pizza crust:

1) Using a pizza stone. Seriously, don’t forget the pizza stone. Pizza stone. Pizzzzzaaaa sttttoooonnneee.
2) Preheating your oven (and pizza stone) on the highest setting for at least an hour*. This will give you that nice crusty bottom but still a nice chewy bread.

*Clothing optional, because your house will feel like a sauna.

Thin Crust Pizza Dough

Ingredients:

  • 1 1/2 tsp. active dry yeast
  • 1 tsp. sugar
  • 3/4 cup warm water (about 105°F)
  • 1 cup cake flour
  • 1 cup plus 3 Tbs. all-purpose flour
  • 1 1/4 tsp. kosher salt
  • 2 Tbs. extra-virgin olive oil

Directions:

In a small bowl, whisk together the yeast, sugar and warm water and let stand until foamy, about 5 minutes.

In the bowl of a food processor fitted with the dough blade, combine the cake flour, all-purpose flour and salt and pulse 3 or 4 times.

Whisk 1 Tbs. of the olive oil into the yeast mixture. With the motor running, slowly add the yeast mixture to the flour mixture, allowing each addition to be absorbed before adding more. Pulse the machine 10 to 15 times to knead the dough. The dough should clean the insides of the bowl but will be slightly sticky.

Coat the inside of a large bowl with the remaining 1 Tbs. oil. Dust your hands with flour and remove the dough from the food processor. Form the dough into a ball and place in the bowl. Cover the bowl tightly with plastic wrap and let the dough rise in a warm place until doubled in size, 1 to 1 1/2 hours. Divide the dough in half and roll out as directed in the pizza recipe. Makes two 10-inch thin-crust pizzas.

Enjoy!

20140624-083514-30914308.jpg

20140624-083512-30912647.jpg

20140624-083513-30913644.jpg

Garlic Scape Pesto

I wrote a song for you all. I think Harry Connick Jr. did a version of it. It’s lovely. 

Here it is:

It’s The Most Wonderful Time Of The Year

With the kids picking spinach
And everyone telling you “happy harvest!”
It’s The Most Wonderful Time Of The Year
It’s the hap -happiest season of all
With those seasonal berries and gay happy cherries
When tomatoes come to call
It’s the hap – happiest season of all

There’ll be carrots for picking
Big melons for licking
And weeding out in the row
There’ll be scary big sluggies
And tales of the glories of
gardens long, long ago

It’s The Most Wonderful Time Of The Year
There’ll be much irrigating
And anticipating
When veggies are near
It’s The Most Wonderful Time Of The Year

Was that a little much? No? I didn’t think so.

Garlic is one of my very favorite things to grow and harvest. It’s so tall, handsome, easy, knows how to impress, smells amazing… 😉 …Plus you get scapes. Have you ever had them? They will blow your socks off… 😉
My favorite way to eat them is making them into pesto. Wowee. I thought I loved pesto before, but now! It’s a whole new love affair. Shh, don’t tell my husband 😉

Have I taken the innuendo’s to far? The winking, it’s a little much isn’t it. Okay I’ll stop.

scapes, garlic, cilantro

scapes, garlic, cilantro

Garlic Scape Pesto

Serves: About 1 cup
Ingredients
  • 1/2 cup coarsely chopped garlic scapes
  • 1 cup fresh basil leaves
  • 1 tablespoon lemon juice
  • 1/4 teaspoon salt
  • 1/2 cup olive oil
  • 1/4 cup sliced almonds, toasted (I even just used pre-sliced almonds from Costco, tasted just as good!)
  • 1/3 cup Parmesan cheese
Instructions
  1. Place the garlic scapes, basil, lemon juice, salt and half of the olive oil in the bowl of a food processor.
  2. Process until the basil and garlic scapes are finely chopped.
  3. Add the toasted almonds and process until smooth.
  4. With the food processor running, slowly drizzle in the remaining oil until everything is well blended.
  5. Add the Parmesan cheese and pulse a few more times.
  6. Season with additional salt, if needed.
  7. Store in the refrigerator until ready to use.
Garlic scape pesto

Garlic scape pesto

Wheat and Flaxmeal tortillas

We eat a lot of tortillas around here. Burritos, tacos, quesadillas, wraps…and I unshamefully admit that I love tortillas with melted butter in them. Comfort food to the max. Anyone else? No? Just me? There’s reasons why I didn’t marry a doctor.

But back to these healthy tortillas..
…drizzled in butter…
I kid..
..

I found a few recipes that looked yummy, but I wanted something that was delicious but super healthy. Maybe even vegan. So after a bit of tweaking, I made a tortilla that was vegan, healthy, hearty, but still soft and yummy. Plus it’s really versatile.

20140610-090053-32453590.jpg

Wheat and flax-meal tortillas
*this recipe calls for 2 cups of flour, please use any combination of flours you want*

1 cup of white flour
1/2 cup of wheat flour
1/2 cup of ground flax-meal
1/2 tsp salt
1/4 cup of avocado oil
1 tsp of baking powder
1/2 cup of warm water

Directions:

1) Sift the flours, salt and baking powder into a large mixing bowl.

2) Add oil and mix with your fingertips or spoon to combine.

3) Add water, and mix into the dough until a sticky ball forms.

4) Cover and let it rest for at least 30 minutes.

5) Divide the dough into 8-10 balls for small tortillas or 4-6 balls for larger ones, cover them again with the damp cloth.

6) Lightly dust a counter with flour and roll out each ball of dough into a somewhat round shape. Roll out as thin as you can. Don’t roll the dough out more than once or the tortillas will be tough.

7) Heat pan or cast iron skillet over high heat for 5 minutes. Cook the tortillas 30 seconds on each side or until slightly browned. Cover the tortillas in foil or a damp cloth and place them in a warm oven.

8) Enjoy!


20140610-091840-33520221.jpg


20140610-091840-33520516.jpg

Roll them out as thin as you can!


20140610-091840-33520828.jpg

thin thin thin

20140610-091839-33519924.jpg

Get in my belly.


Gardening update

I love Sundays, especially early in the morning, when no one is really awake. They’re so peaceful and simple.

10294470_10101896043640312_2809316839750802942_n

Noli and I went out this morning to check on the garden and make sure everything was going well, here’s an update on everything we are growing!

Basil: I wasn’t thinking and didn’t harden it off. Dummy. Soooo, it’s growing still, but it’s looking a little rough. But I think it’ll be fine. I might pick up a few plants just to be on the safe side. You can never have too much basil!

Beets: Attacked by the Spanish Leaf Miners. *insert crazy gardening lady with clippers and a spray bottle filled with soapy water*. Good news, although the leaves might look a little rough, the roots themselves are good and growing strong!

Cantaloupe: Still no sign..I didn’t keep track of when I planted it, although it was the same time as corn. (2 weeks ago?) I’ll give it a few more days and replant it.

Carrots: Carrots, you never fail me. You are delicious. I love you. (They are growing amazingly well, of course).

Celery: I’m not sure how this is going. It’s growing. It’s small..there’s no guarantees it’ll make it. I’m not placing any bets.

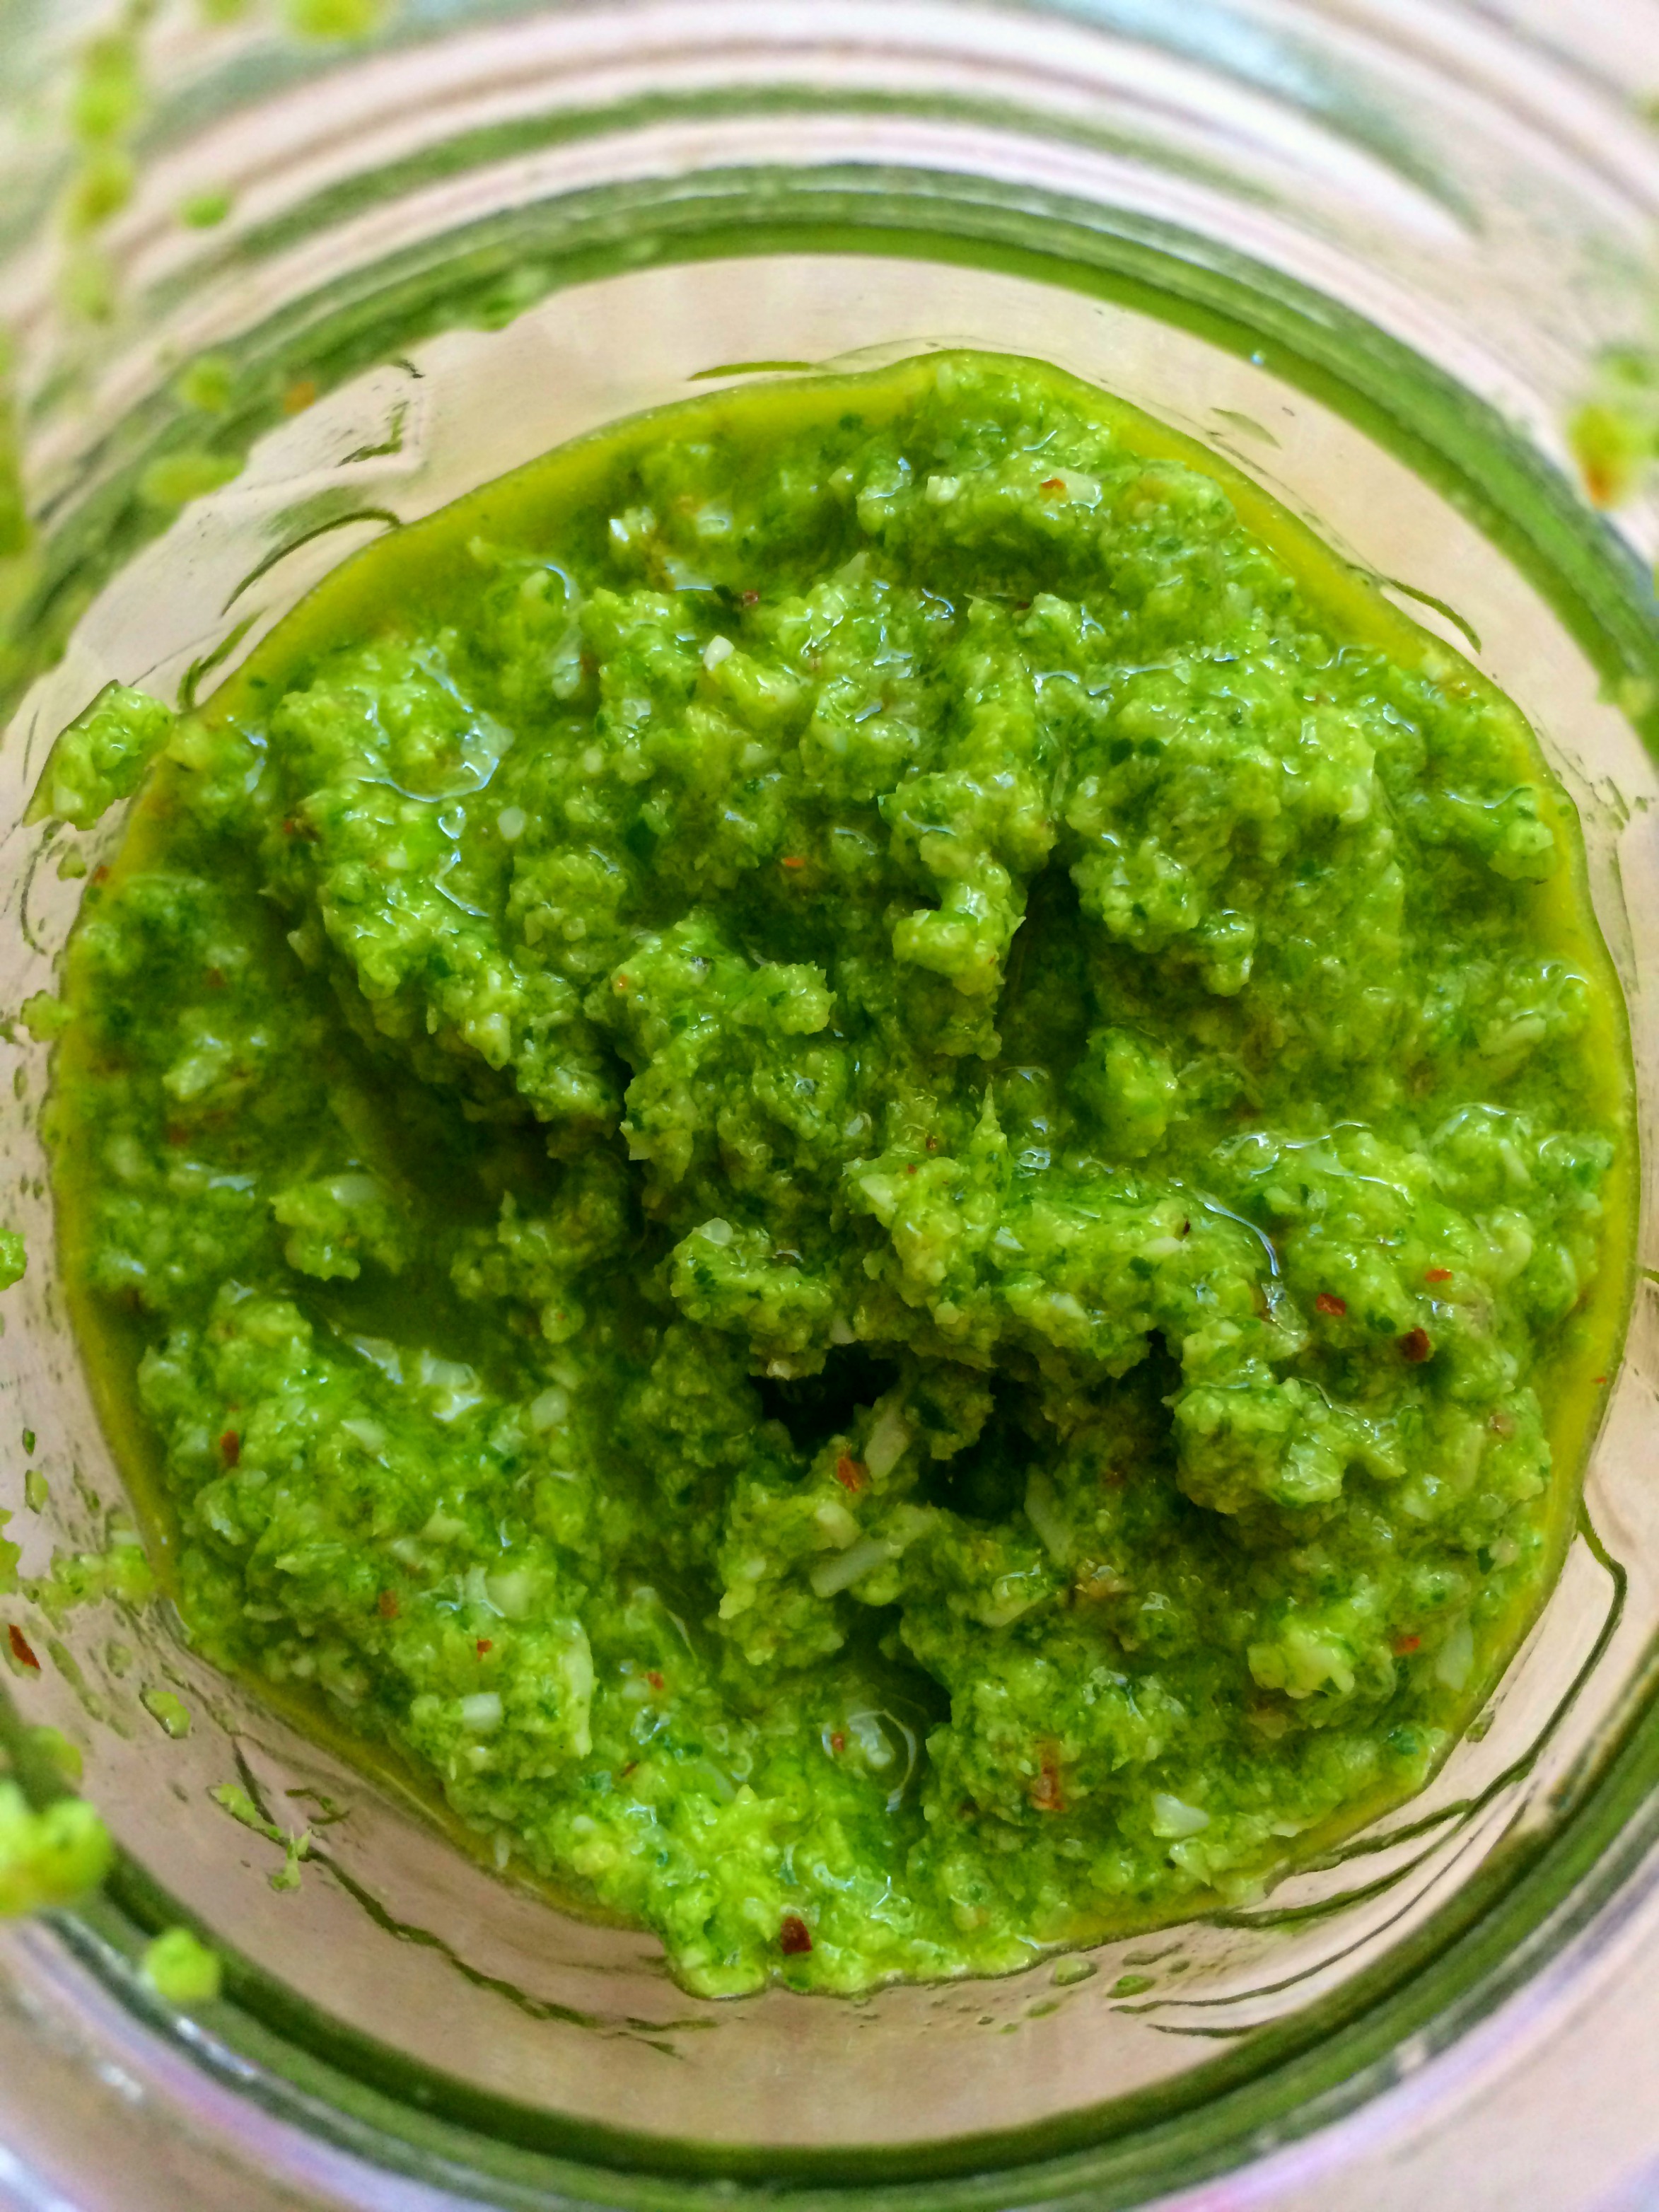
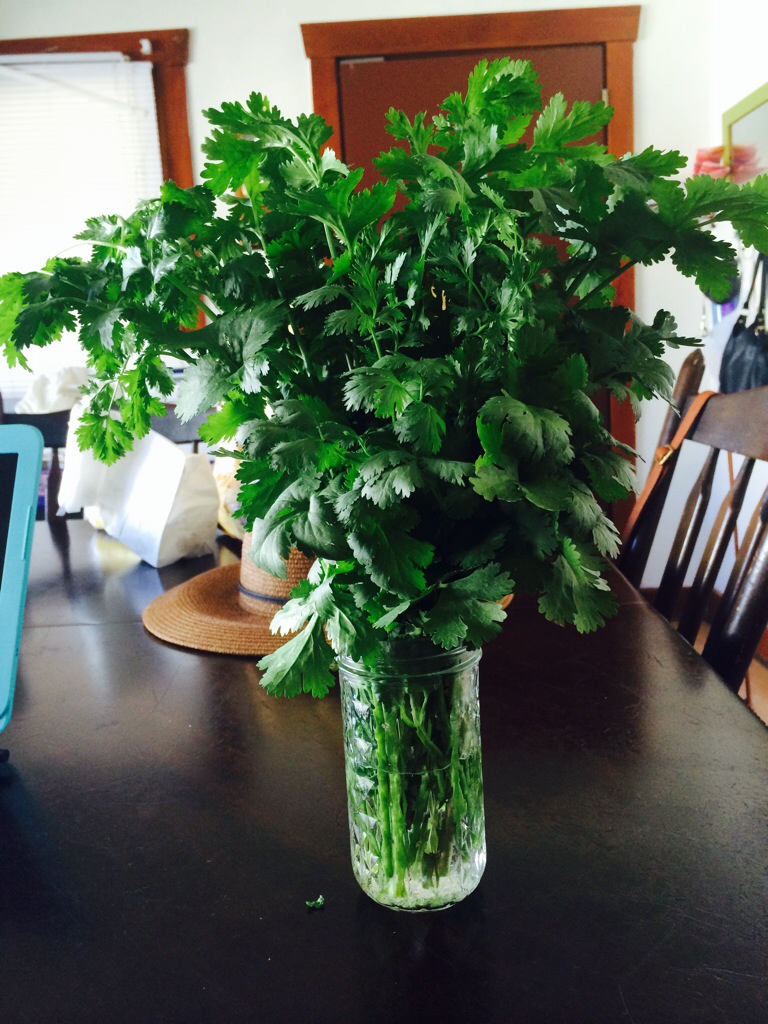
Cilantro: Harvested 3 HUGE bunches of this. We cut back the plants to the base and are waiting for more to sprout before it gets to hot and bolts.

Corn: It has started to pop up! Thank goodness! I felt like that took forever! Something about growing corn makes me feel like a real farmer.

Garlic: Everything is looking good so far. This is definitely one of the harvests I’m looking forward to most. Unfortunately we had to harvest one a little early (someone, or some furry black dog named Charlie, stepped on it).

Green Beans: I started these outdoors last-minute, in a spot that wasn’t even intended for anything. But they are growing great and I’ll be glad I planted them.

Horseradish: My one regret, NEVER GROW HORSERADISH IN ANYTHING BUT A CONTAINER. They will take over and conquer. The good news is, horseradish is delicious.

Hubbard squash: This beautiful plant has popped up and is looking strong and handsome. Has anyone else grown it? If you like pumpkin pie, grow this. Pumpkin doesn’t hold a candle to Hubbard.

Kale: Kale is doing beautifully, already harvested 3 HUGE bunches.

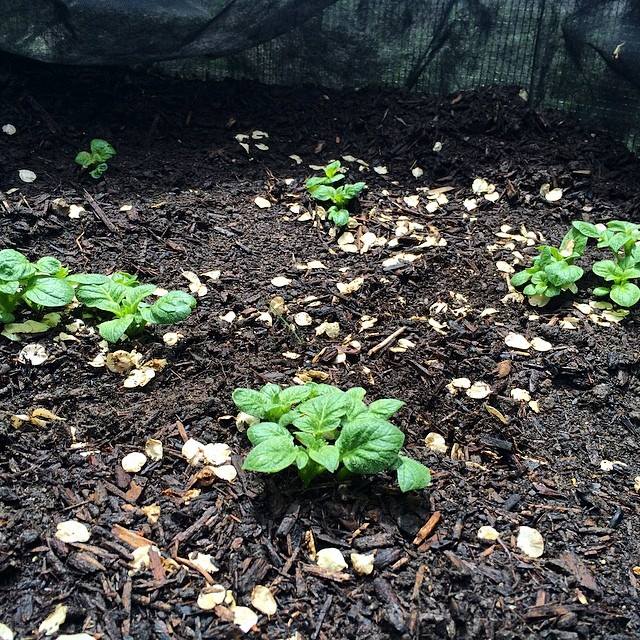
Potatoes: Wowee. These guys. They sure know how to grow. Handsome little taters.

Snow Peas: Growing STRONG, but….it’s getting hot. Like really hot. So I don’t think they’re going to be very tasty. But we’ll see!

Spinach: Damn Spanish Leaf Miners.. but overall it’s been a good harvest so far. Probably about 2 big bunches/or 3 salad bowls full (I’m going to get a better system down this week).

Strawberries: I’m so glad we have strawberries. If you don’t have berries in your garden, you need to get some. Your gardening life will never be the same. I think next year I’m going to double and/or triple our strawberry plants.

Tomatoes: This year I started my tomatoes indoors, and although they did great in the beginning, they became spindly from lack of strong light (we were using shop lights). Next year I’ll definitely build a mini green house, just for the tomatoes and peppers. I think they will do fine since we re-planted some of them sideways to give them more roots. A few we left as is to see if it made any difference. (8 in total). AND they are flowering which is a good sign!

Zucchini: I bought an heirloom plant of this about a week or so ago. I didn’t think I wanted zucchini this year, but when I went to the store and had to pay .69 cents for ONE zucchini squas. I about died, and immediately put a plant in the ground.

Things I wish I had room for: Cucumbers, broccoli and raspberries. And about a billion other plants. But these were the top 3.

Is anyone keeping track of their harvest this year? I decided to see how much money I’m saving this growing season and I’m keeping track of the number and weight of my produce! So far I’ve harvested: 1 lb of organic spinach ($4.12 per lb), 10 oz of organic garlic scapes ($7 per 1/2 lb), 1 lb 8 oz of organic cilantro ($1.46 a bunch), 3 lb of organic kale ($1.97 a bunch), 1 German Red organic garlic head ($3.50 ea), and 3 organic strawberries!
Estimate savings price for May: Est. $27.91
Total savings to date: Est. $27.91

So far so good.

And…I’ll end with a few pictures!

20140601-110438-39878434.jpg

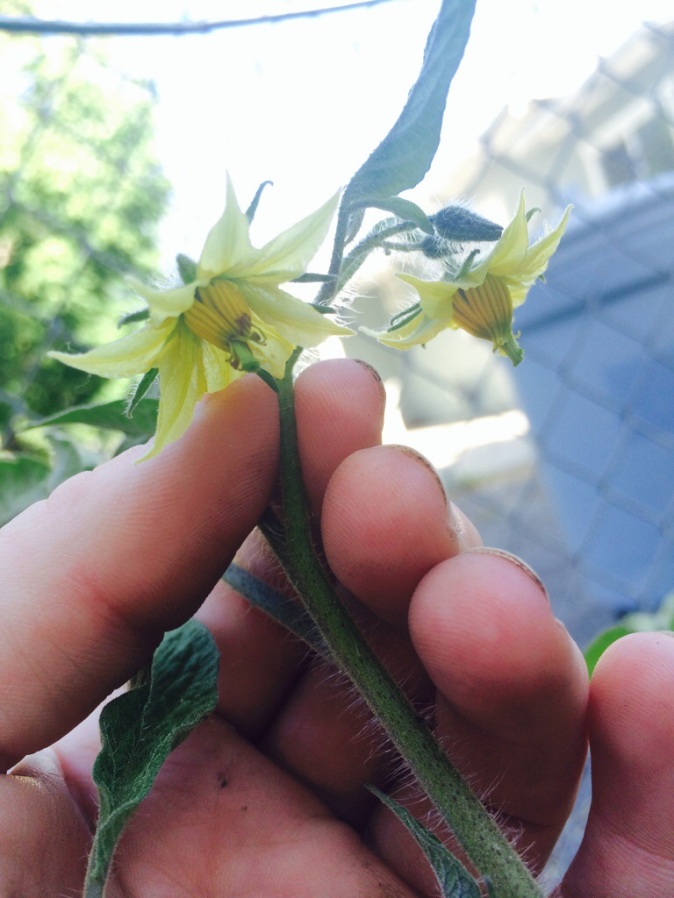
Hey tomato flowers, lookin’ goood!


20140601-113858-41938489.jpg

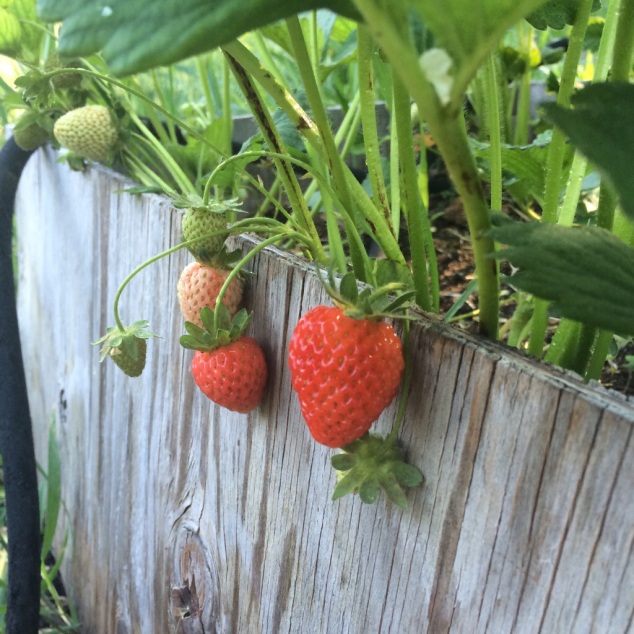
My daughter already ate all the partially ripe berries. She knows what’s up.

20140601-113900-41940157.jpg

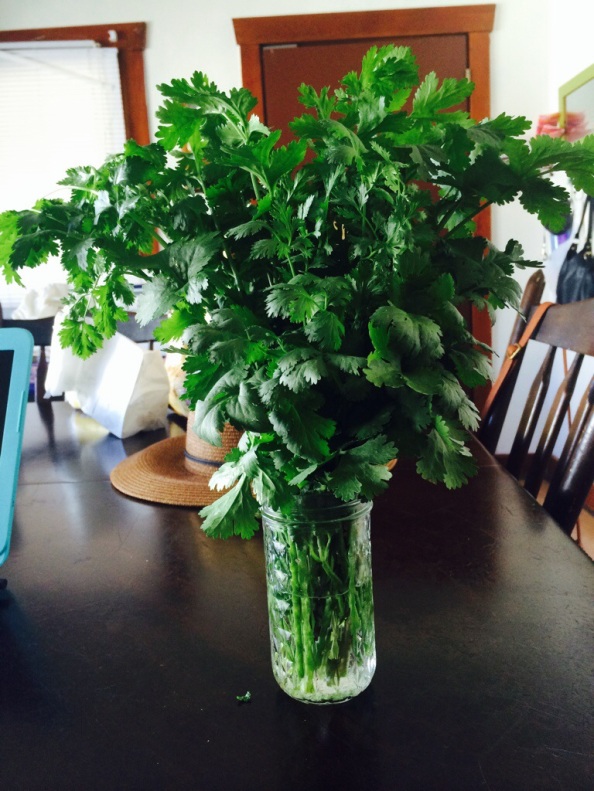
Bouquet of cilantro.

20140601-113901-41941104.jpg

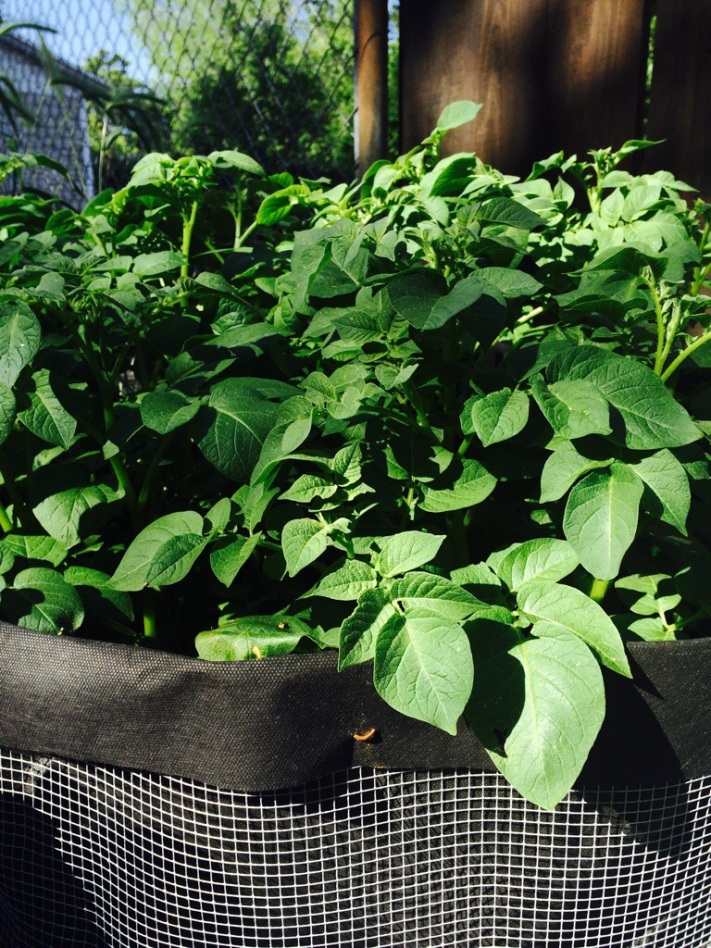
Potatoes aren’t wasting anytime!

20140601-113859-41939555.jpg

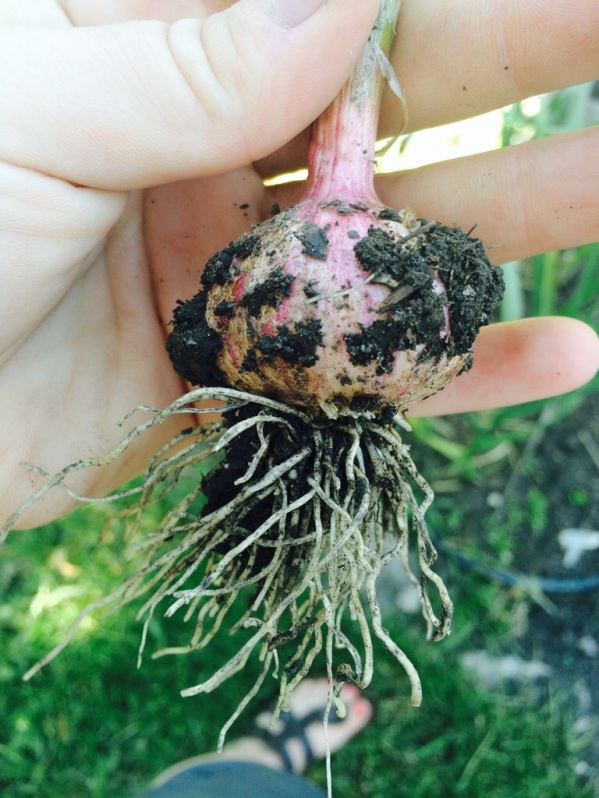
Had to harvest this guy early, got trampled. Not sad one bit!

Buttermilk blueberry breakfast cake

I’m terrible at writing new posts. It’s bad. To make it up, can I buttery you up a big slice of buttermilk blueberry breakfast cake? It’s pretty good. Which is an understatement. When you take a bite, it reminds you of being 5 years old at your grandmas house. With sleepy eyes and heightened senses, you can smell your grandma pulling the cake out of the oven from your bedroom. The crispy, sugary top and the moist blueberry middle, I wouldn’t be surprised if you started to cry a little. I know I did.

Image

Buttermilk Blueberry Breakfast Cake

Serves 6-8

½ cup unsalted butter, room temperature
2 tsp. lemon zest or more — zest from 1 large lemon (I did 3 tsp of orange zest I had frozen, it was perfect!)
7/8 cup* + 1 tablespoon sugar**
1 egg, room temperature
1 tsp. vanilla
2 cups flour (set aside 1/4 cup of this to toss with the blueberries)
2 tsp. baking powder
1 tsp. kosher salt
2 cups fresh blueberries
½ cup buttermilk***

* 7/8 cup = 3/4 cup + 2 tablespoons
** This 1 tablespoon is for sprinkling on top
*** To make homemade buttermilk, place 1 tablespoon of vinegar or lemon juice in a liquid measuring cup. Fill cup with milk until it reaches the 1-cup line. Let stand for five minutes. Use only 1/2 cup of the prepared mixture for the recipe.

1. Preheat the oven to 350ºF. Cream butter with lemon zest and 7/8 cup of the sugar until light and fluffy.

2. Add the egg and vanilla and beat until combined. Meanwhile, toss the blueberries with ¼ cup of flour, then whisk together the remaining flour, baking powder and salt.

3. Add the flour mixture to the batter a little at a time, alternating with the buttermilk. Fold in the blueberries.

4. Grease a 9-inch square baking pan (or something similar) with butter or coat with non-stick spray. Spread batter into pan. Sprinkle batter with remaining tablespoon of sugar. Bake for 35 to 45 minutes. Check with a toothpick for doneness. If necessary, return pan to oven for a couple of more minutes. (Note: Baking for as long as 10 minutes more might be necessary.) Let cool at least 15 minutes before serving.

Enjoy!

Just a friendly reminder!

It is CRUCIAL to keep your potatoes well watered, especially during the flowering stage and right after. 1-2 inches of water a week! When foliage turns yellow and starts to die back, discontinue watering.

La Ratte and Yellow Finn

La Ratte and Yellow Finn

Strawberry Raspberry Jam

I’m pretty sure Sundays are the best day for making jam. Everyone is home, the sun in shining; maybe you have some homemade bread baking in the oven.. and you are pretty sure that today couldn’t get any better.

Until…

You find the most amazing strawberry raspberry jam recipe in the entire world. I mean it. Your world will officially be changed for the better. The sun will shine a little brighter now, the birds sing a little louder, and the best songs will always play on the radio… and it’s commercial free radio.

First off, you need to find the best fruit. I’ve started going to our local Utah Food CoOp in Murray Utah. They have wholesale organic produce that you can buy in bulk for a good price, plus the people are just so nice there. We bought 12-6 ounces containers of raspberries and 8 lb of strawberries. That gave us plenty for jam and a lot left over for snacking. I got this recipe from the blog Simply So Good, but switched out the corn syrup for my own home made simple syrup, recipe below.

10308372_10101858737557002_700960924535230386_n

Strawberry Raspberry Freezer Jam
 
1 1/2 cups crushed strawberries (2 pints)
1 3/4 cups crushed raspberries (2 pints)
1/4 cup fresh lemon juice
4 1/2 cups sugar
1 cup light corn syrup (or simple syrup)
1 package Pectin (this recipe is from a package of MCP pectin)
  1. Wash and rinse containers with tight fitting lids.
  2. Prepare fruit by rinsing and crushing berries.  Measure exactly and place in a large mixing bowl.
  3. Stir in lemon juice.
  4. Gradually stir 1 box of MCP pectin into fruit.  Mix thoroughly.  Set aside 30 minutes, stirring every 5 minutes to dissolve pectin thoroughly.
  5. Measure exact amount of sugar into a separate bowl.  Do not reduce the amount of sugar.  If you do, your jam will not set.  Set aside.
  6. Pour 1 cut light corn syrup into fruit mixture.  Mix well.  This prevents sugar crystallization during freezer storage.
  7. Stir in sugar gradually.  Stir constantly until sugar is completely dissolved and no longer grainy.
  8. Pour into prepared containers, leaving 1/2-inch space at top for expansion during freezing; cover.
  9. Let stand at room temperature 24 hours until set.  Refrigerate up to 3 weeks or freeze for up to one year.  Thaw in refrigerator.
Makes 7 cups of jam
Simple Syrup
1 cup of sugar
1/4 cup of water
Put ingredients in a small pot, stir, and bring to a boil. Turn off heat and let it stand till it’s cooled down.
Makes about 1 cup of simple syrup
Enjoy!

Lemon Poppy Seed Pancakes

Something magical just happened this morning.

It was beautiful.

It was delicious.

It was lemony.

It was poppy seed-y.

It was soft.

and moist.

Covered in butter.

and a little bit of maple syrup.

O, lemon poppy seed pancakes, how I love you.

20140413-084658.jpg

Little hands make light work…or a lot of work 😉

20140413-084426.jpg

Lemon zest makes me a better person, I’m sure of it.

20140413-084436.jpg

Did you know that every gram of seeds has about 33 micrograms of morphine and 14 micrograms of codeine. Cover that with flour, sugar, butter and syrup and you have Christmas morning.

20140413-084451.jpg

Lemon Poppy Seed Pancakes

(makes a lot! About 20 small/medium sized pancakes)

2 tablespoons granulated sugar

2 tablespoons fresh lemon zest

2 cups all-purpose flour

2 teaspoons baking powder

1 teaspoon baking soda

1 teaspoon salt

2 cups buttermilk

2 large eggs

2 teaspoons pure vanilla extract

2 tablespoons fresh lemon juice

4 tablespoons unsalted butter, melted

2 tablespoons poppy seeds

butter, shortening, or vegetable oil for frying

maple syrup for serving

In a small bowl combine granulated sugar and lemon zest.  Rub together with your fingers until sugar is fragrant.  Set aside.

In a large bowl, whisk together flour, baking powder, baking soda, and salt.  Stir in the lemon sugar.  Set aside.

In a separate bowl (or you can use a large liquid measuring cup), whisk together buttermilk, eggs, vanilla extract, lemon juice, and melted butter.  Pour the wet ingredients all at once into the dry ingredients.  Add the poppy seeds and stir to combine.  If a few lumps remain, that’s no problem.  Let the batter rest for 10 minutes while the griddle heats.

Place a griddle, or a nonstick saute pan over medium heat.  Add a bit of butter, shortening, or vegetable oil to the pan.  A teaspoon of fat will do for a n0nstick saute pan, a bit more fat may be necessary for a griddle.  Dollop batter onto hot pan.  For small pancakes, I use about 2 tablespoons for each pancake.  For larger pancakes, I use about 1/4 cup of batter.  Cook until golden brown on the bottom and and bubbling on top.  Flip once and cook until golden brown on each side.

Place cooked pancakes on an oven-proof plate and place in a warm (about 150 degrees F) oven until all pancakes are cooked and ready to serve.  Serve with butter and warm maple syrup.

ENJOY!

Beets


c33233da4795216aa2f3146a10929f5df94d00ec1898e542fbeeef8b7b7ad345

So I just planted my beets the other day, and in celebration I bought some from our local grocery store. I cooked them for about an hour in the oven and then chopped them up with some pears and nuts and put them in some mixed greens. It was a day to remember.

This is my first year growing beets and I decided to grow the Early Wonder variety. It’s a old heirloom variety dating back to pre-1811. Must be good if they’ve been haulin’ them around this long 😉

Here are some  facts about our little mediterranean native:

  • They are packed full of: potassium, folic acid, manganese, fiber, vitamin a, c, calcium, and iron
  • They are biennial- meaning they flower and set seed their second season
  • VERY cold hardy.
  • Sow directly into the ground, but soak the seeds in warm water for a few hours before placing in the soil. Helps with germination. (Which I didn’t do…shoot)
  • Each seed is actually a cluster of 2-6 seeds
  • Plants that reach maturity during hot weather will have less color and flavor. Dress your plants with compost and plant in the shade of another plant to secure your chances of a good harvest

Growing beets:

  • First off, pick a nice sunny location that has well drained soil
  • Amend your soil with organic material working it in to a depth of 8-10 inches
  • Sow seeds 2-4 inches apart, water well and add a thin layer of dressing. This helps to moderate soil moisture and temperature. *Keep beets watered well and you will have happy gardeners and happy beets*
  • Beets require lots of phosphorus to grow healthy large roots. If you run a soil test and you find in lacks in phosphorus give your plants a side dressing of bonemeal or rock phosphate. (Favored pH range for beets is 6.0-7.0)
  • Stop sowing seeds once the temperatures reach about 75 degrees, but start again 8 or so weeks before the first fall frost, for a late season harvest

Harvesting beets:

  • Beets taste best when they are 1.5-2.5 inches in diameter. After that they start to lose flavor and the texture becomes unappetizing
  • Beet greens can be harvested as soon as plants are an inch or two high. Older greens are best when steamed or sauteed.
  • When beets are ready to harvest, pull or dig them out then remove the tops by twisting them or cutting them off, being careful to leave a few inches of stem on the root to keep them from bleeding and losing their moisture. They can be stored this way, in the fridge for up to a week
  • For long term storage, layer the beets in damp sawdust or sand and keep in a moist cold root storage until ready to use


  • Beet seeds